Privet hedging is one of the most popular and versatile hedging choices for UK gardens. Whether you are looking for a dense privacy screen, a neat formal boundary or a fast-growing hedge that establishes quickly, privet (Ligustrum) ticks all the boxes. In this guide, we cover everything you need to know about planting, spacing and caring for a privet hedge that will thrive for years to come.
Why Choose Privet Hedging?
Privet has been a staple of British gardens for generations, and for good reason. It is one of the fastest growing hedging plants available, capable of putting on 30 to 60cm of growth per year once established. This makes it an excellent choice if you need a hedge that fills in quickly.
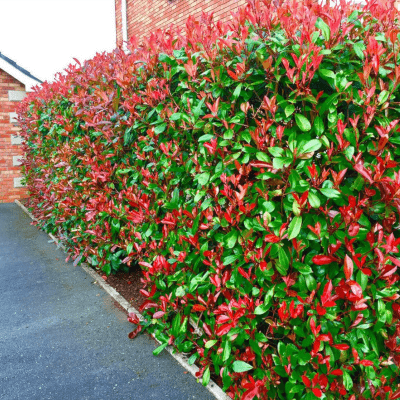
Green privet (Ligustrum ovalifolium) is semi-evergreen in most parts of the UK, retaining the majority of its leaves through winter except in the coldest conditions. Golden privet adds a splash of colour with its bright yellow and green variegated foliage, making it an attractive alternative for gardeners who want something a little different.
Key benefits of privet hedging include:
- Fast growth rate of 30-60cm per year
- Dense foliage that provides excellent privacy and wind protection
- Tolerates hard pruning and responds well to regular trimming
- Grows in most soil types including clay and chalk
- Thrives in full sun or partial shade
- Available as both bare root and pot grown plants
- Relatively inexpensive compared to many other hedging species
Types of Privet for Hedging
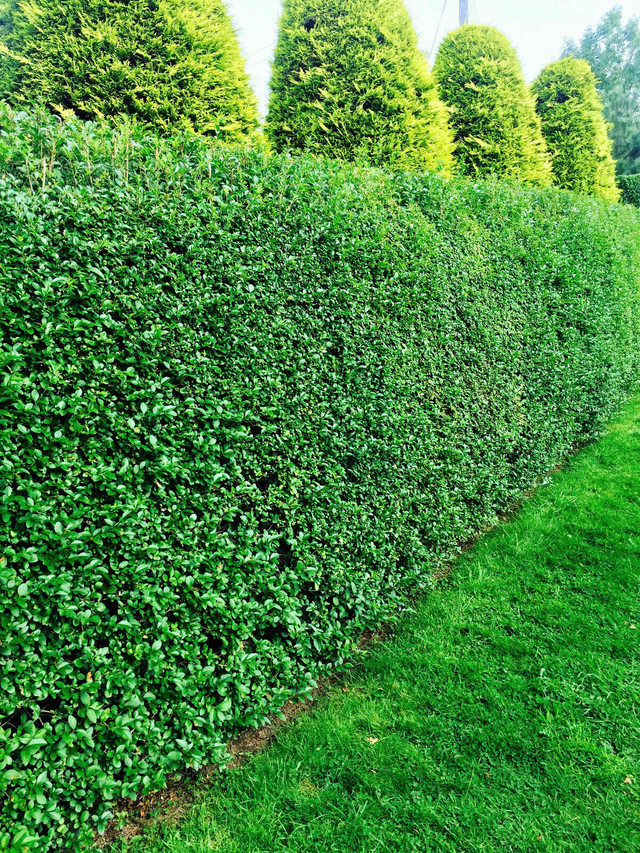
Green Privet (Ligustrum ovalifolium)
Green privet is the most commonly planted variety in the UK. It produces oval, glossy dark green leaves and small white flowers in summer that are popular with bees and other pollinators. It is semi-evergreen, meaning it may lose some leaves in very cold winters but will quickly recover in spring. Green privet is ideal for formal hedges, boundary planting and garden screening.
Golden Privet (Ligustrum ovalifolium ‘Aureum’)
Golden privet offers the same robust growing habits as green privet but with stunning yellow-edged leaves that brighten up any garden. It works beautifully as a standalone hedge or can be mixed with green privet to create a two-tone effect. Golden privet is slightly slower growing than its green counterpart but still establishes quickly.
Wild Privet (Ligustrum vulgare)
Wild privet is the native British species and is fully deciduous, losing its leaves in winter. It is an excellent choice for wildlife hedges and rural boundaries, producing fragrant white flowers followed by black berries that birds love. Wild privet works well as part of a mixed native hedge alongside hawthorn, blackthorn and field maple.
Best Time to Plant Privet Hedging
The best time to plant privet hedging depends on whether you are planting bare root or pot grown plants:
- Bare root privet should be planted during the dormant season, from November through to March. This is the most cost-effective way to establish a privet hedge, particularly for longer runs. Bare root plants establish well when planted during this window as the roots can settle before the growing season begins.
- Pot grown privet can be planted at any time of year, though spring and autumn are ideal. If planting during summer, make sure to water regularly until the plants are established. Pot grown plants tend to be slightly more expensive but offer greater flexibility with planting times.
Avoid planting when the ground is frozen or waterlogged. If your bare root plants arrive and conditions are unsuitable for planting, heel them into a sheltered area of the garden with moist soil until you are ready to plant.
How to Plant a Privet Hedge
Follow these steps for the best results when planting your privet hedge:
Step 1: Prepare the Ground
Mark out your hedge line using a string line or garden canes to ensure a straight row. Dig a trench approximately 45cm wide and 30cm deep along the full length of your planned hedge. Fork over the base of the trench to loosen compacted soil and mix in well-rotted garden compost or planting compost to improve soil structure and provide nutrients.
Step 2: Soak the Roots
Before planting, soak bare root privet plants in a bucket of water for at least one hour. This rehydrates the roots after transit and gives them the best possible start. Pot grown plants should also be given a thorough watering before being removed from their containers.
Step 3: Plant at the Correct Spacing
Place your privet plants in the trench at the recommended spacing (see our spacing guide below). Ensure each plant sits at the same depth it was previously growing. For bare root plants, look for the soil mark on the stem. Spread the roots out evenly and backfill with the improved soil, firming gently around each plant as you go.
Step 4: Water and Mulch
Water the newly planted hedge thoroughly and apply a layer of bark mulch or garden compost around the base of the plants. This helps retain moisture, suppress weeds and insulate the roots during cold weather. Continue to water regularly during the first growing season, especially during dry spells.
Privet Hedge Spacing Guide
Getting the privet hedge spacing right is essential for a dense, uniform hedge. The recommended spacing depends on the size of the plants and the density of hedge you require:
- Small plants (40-60cm): Plant 4 to 5 per metre (approximately 20-25cm apart) for a dense hedge
- Medium plants (60-90cm): Plant 3 to 4 per metre (approximately 25-33cm apart)
- Larger plants (90cm+): Plant 2 to 3 per metre (approximately 33-50cm apart)
For a single row hedge, plant in a straight line. If you want a thicker, more substantial hedge more quickly, consider planting a double staggered row with plants offset in a zigzag pattern, spacing the rows about 30cm apart. This uses more plants but creates a fuller hedge faster.
Pruning and Maintaining Your Privet Hedge
Privet is one of the easiest hedging plants to maintain. Its vigorous growth means it responds very well to pruning and will quickly fill in any gaps.
First Year After Planting
In the first year, cut back the top growth by about one third after planting. This may seem counterintuitive, but it encourages the plant to produce bushy lateral growth from the base rather than growing tall and leggy. This initial pruning is the single most important step for creating a dense hedge.
Ongoing Pruning
Once established, privet hedges should be trimmed two to three times per year for a neat, formal appearance. The main pruning times are:
- Late spring (May-June): First trim of the year once new growth has appeared
- Mid-summer (July-August): Second trim to maintain shape during peak growing season
- Early autumn (September): Final tidy-up before winter if needed
When pruning, aim to create a hedge that is slightly narrower at the top than the base. This tapered shape allows light to reach the lower branches, preventing bare patches at the base of the hedge. Use sharp hedge shears or a powered hedge trimmer for the best finish.
Common Problems with Privet Hedges
Privet is generally a tough and trouble-free hedging plant, but there are a few issues to watch out for:
- Privet hedge losing leaves: This is usually caused by drought stress or severe cold. Water well during dry periods and ensure the base of the hedge is mulched to retain moisture.
- Honey fungus: Privet can be susceptible to honey fungus, which causes die-back. Remove affected plants promptly and avoid replanting privet in the same spot.
- Bare patches: Usually caused by insufficient light or lack of pruning. Cut back hard in late winter to stimulate new growth from the base.
- Aphids: Privet aphid can cause leaf curling in spring but rarely causes serious damage. Natural predators such as ladybirds usually keep populations in check.
Where to Buy Privet Hedging Plants
At Sunnyside Nurseries, we stock a range of high-quality privet hedging plants to suit every budget and garden. Our range includes bare root green privet, pot grown green privet and golden privet, all grown to the highest standards and available for delivery across the UK and Ireland.
Whether you are planting a short garden boundary or a long rural hedge, we can supply the right plants at competitive prices with free standard delivery. Browse our privet hedging collection today or get in touch if you need advice on quantities and plant sizes for your project.
Frequently Asked Questions
How fast does privet hedging grow?
Privet is one of the fastest growing hedging plants, typically growing 30 to 60cm per year once established. With good soil preparation, regular watering and annual feeding, you can expect your privet hedge to reach a usable height within two to three years of planting.
Is privet hedging evergreen?
Green privet (Ligustrum ovalifolium) is classified as semi-evergreen. In most UK gardens it will retain its leaves through winter, but in very cold or exposed locations some leaf drop may occur. The native wild privet (Ligustrum vulgare) is fully deciduous.
How many privet plants do I need per metre?
For a standard single-row hedge, we recommend 3 to 5 plants per metre depending on the size of the plants. Smaller plants (40-60cm) should be planted more closely at 4-5 per metre, while larger plants (90cm+) can be spaced at 2-3 per metre.
Can I plant privet hedging in shade?
Yes, privet grows well in partial shade as well as full sun. However, golden privet produces its best leaf colour in a sunny position. In deep shade, privet may grow more slowly and produce thinner foliage.
For more detailed information on privet species and care, visit the Royal Horticultural Society guide to Ligustrum ovalifolium or read the Woodland Trust profile on wild privet.